Work Smart
Stay Safe
Empower your team with seamless access, bullet-proof password management, and smarter cost savings—with zero friction
Empower your team with seamless access, bullet-proof password management, and smarter cost savings—with zero friction
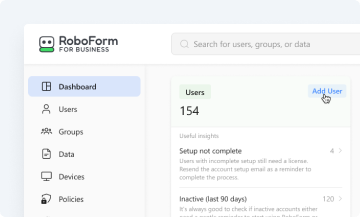
Full control over user onboarding, company settings, security policies, data management, reporting, and audits — plus user and device access — all from one central hub.
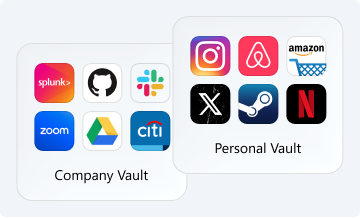
Secure, individual work and personal vaults for each employee to generate, store, and autofill unique, complex passwords on any device, with full separation between company and personal data.

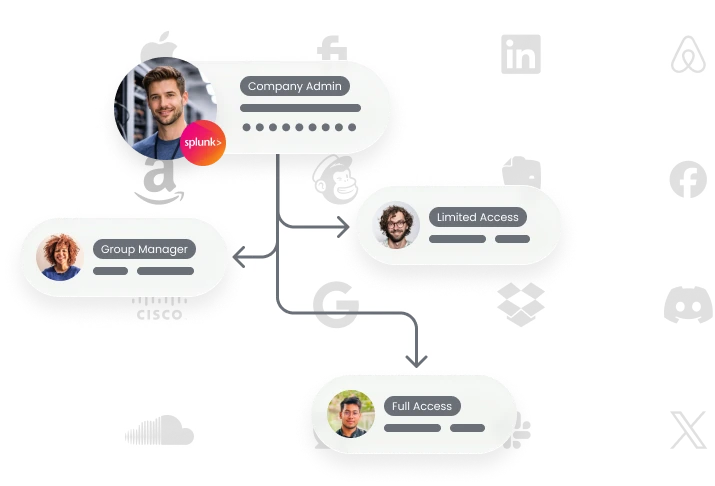
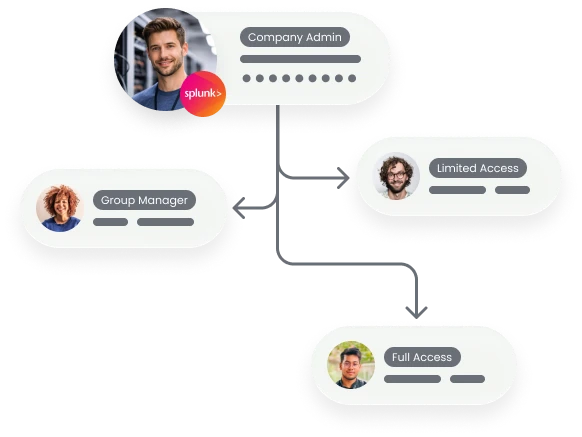
Granular sharing permissions ensure the right people have the right credentials — securely. Multiple sharing tiers adapt to organizations and teams of any size or structure.
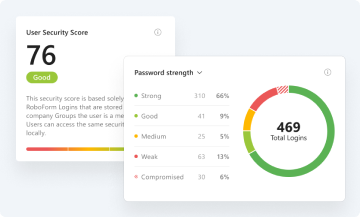
Real-time insights into password health and security compliance for each employee, group, and the company as a whole — including a compromised password scanner and continuous data breach monitoring.
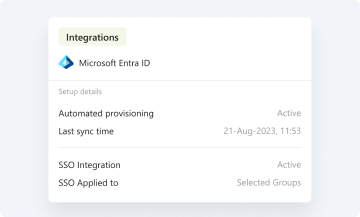
Seamless integration with major identity providers, including Microsoft Entra, Okta, Google Workspace, Ping, and OneLogin, for automated provisioning, deprovisioning, and single sign-on access.
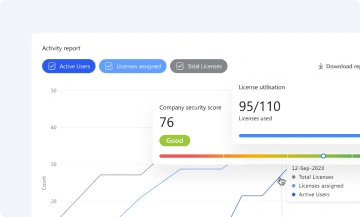
Comprehensive, exportable activity logs and compliance-ready reports deliver complete visibility and accountability.
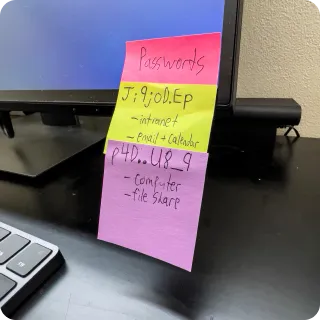
Employees juggle a dozen logins a day, can’t remember them all, and start cutting corners.
That means more help desk tickets, higher costs, and serious security risks.
RoboForm makes secure, complex passwords effortless — so your team stays productive, compliant, and protected.
Your team shouldn’t need multiple tools to log in securely. Jumping between password managers, authenticator apps, and browsers slows everyone down and increases the risk of lockouts.
With RoboForm, it’s all built in. Store and autofill TOTP-based authenticator codes for any third-party portal, manage and use passkeys, and sign in with the highest level of security — all without leaving RoboForm.

RoboForm provides robust security controls to enforce strict compliance policies across all users. Admins can require measures like 2FA, strong password rules, and access restrictions. Advanced reporting confirms these controls are effective, highlights compliance rates, and flags potential risks — helping you prove and maintain a strong security posture.

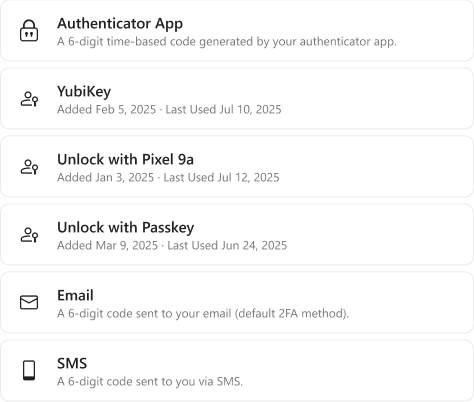
Security shouldn’t slow your team down. With RoboForm, you can unlock accounts without ever typing a password — on any device.
Choose from SSO integration, passkeys, hardware security keys, or trusted devices. Layer on multiple 2FA options, including passkeys, hardware keys, email, SMS, and authenticator apps, for maximum flexibility and protection.
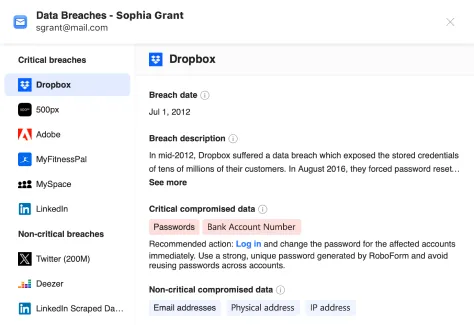
RoboForm continuously scans trusted breach databases for passwords or corporate emails linked to your accounts. If a match is found, admins and affected users are alerted with recommended actions. This early warning helps you fix vulnerabilities fast and prevent potential leaks.

Get your team up and running in hours, not weeks. RoboForm offers guided setup, bulk user import, and integration with your existing systems. Our dedicated onboarding engineers ensure a smooth rollout, while ongoing priority support keeps your team productive and secure from day one.
Whether you have 10 users or 10,000, RoboForm scales seamlessly. Flexible licensing, role-based permissions, and automated provisioning make it easy to adapt as your organization changes — without compromising security or adding complexity.


Password habits start at home. By securing personal accounts, employees are less likely to reuse weak or compromised passwords at work. That’s why every RoboForm Business user includes a RoboForm Family plan with up to five personal accounts—strengthening security everywhere.
From setup to savings—watch how RoboForm transforms the way your team works